1.
Click on the
 Feedback Button to open
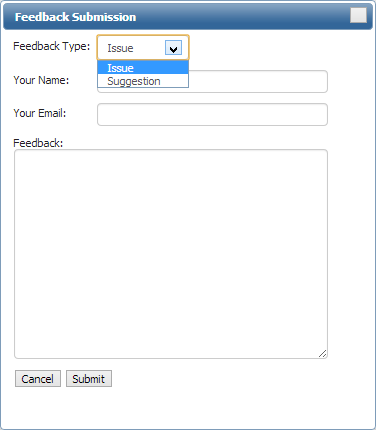
2.
In the pop up window that appears select the type
of feedback you wish to leave, enter your name, your
contact information, and your feedback and click the Submit
Button.
1.
Click on the
 Settings Button to open the
settings screen.
Settings Button to open the
settings screen.
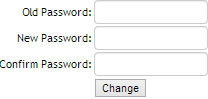
2.
Enter your old password and your new password in
the indicated fields.
3.
Click the Change Button to save the change.
1.
Click on the
Settings Button to open the
settings screen.
2.
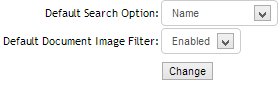
From the drop down menus, the user can select:
a.
The default tab on the Case Details view.
b.
The default search option used on the Search
Screen.
c.
Whether the Case Docket Viewer shows only dockets
with images (Enabled) or all dockets (Disabled) by default.
d.
The screen to be used for the user�s home screen
when logging in.
3.
Click the Change Button to save your preferences.
1.
Click on the
Settings Button to open the
settings screen.
2.
Add a Filter Tab by clicking on the Add Button
and typing in the desired name for the tab.
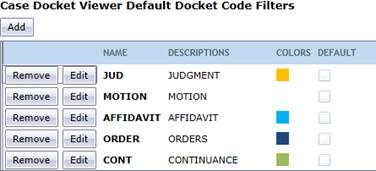
a.
To add a filter based on the docket description,
click on the button under the Descriptions
Column.
i.
From the popup window that appears, select the
desired docket descriptions from the drop down list and
click on the Add Button to add it to the list of dockets to
be shown.
ii.
Once all desired descriptions have been selected,
click on the Done Button to save your changes to the
Description Filter.

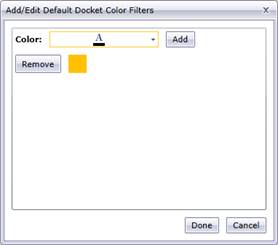
b.
To add a filter based on the docket highlight
color, click on the button under the Colors Column.
i.
From the From the popup window that appears,
select the desired color from the drop down list and click
on the Add Button to add it to the list of colors to be
shown.
ii.
Once all desired colors have been selected, click
on the Done Button to save your changes to the Color
Filter.
3.
To save the Filter Tab, click on the Done button to save the tab.
a.
If defaulting to a particular filter is desired
check the Default checkbox prior to saving the filter.
4.
To edit a tab, Click on the edit button and make
changes as outlined above. When finished, click the Done
Button.
5.
To remove a tab, click on the Remove Button.
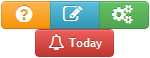
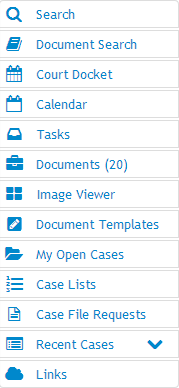
The Today Screen combines information on all pending and
pertinent items for the current day.
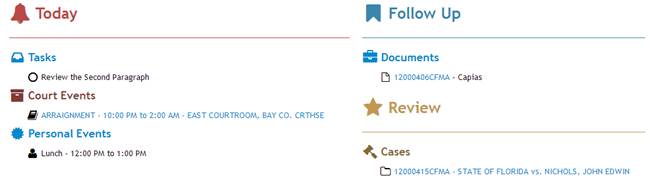
Displays all tasks due on the current day. Clicking on the
tasks header will open the tasks screen. See the section of this
guide related to
Tasks for information on how to add tasks.
Displays the information for all Court events scheduled on
the current day. Clicking on the link for
an event will open that event�s Court Docket.
Displays the information for all personal events scheduled
on the current day. Click on the Personal Events header to
open the Calendar screen. For information on how to add
personal events, see the section of the guide related to
the
Calendar.
Displays all documents that have been flagged as due on the
current day. For information on setting document due dates
see the section of this guide related to
Documents.
Displays all Documents that have been flagged for follow
up. For information on flagging documents for review see
the section of this guide related to
Documents.
Displays cases that have been flagged for review by the
user. For
information on flagging a case for review, see the sections
of the guide related to the
Court Dockets and
Case Details.
Two methods of searching for cases are available:
1.
Searching for a specific term (Name, Citation
Number, Case Number, et cetera), with optional further
refining filters.
2.
Searching without a specific term for all cases
that meet filter criteria (File Date Range, Court Type,
Statute).
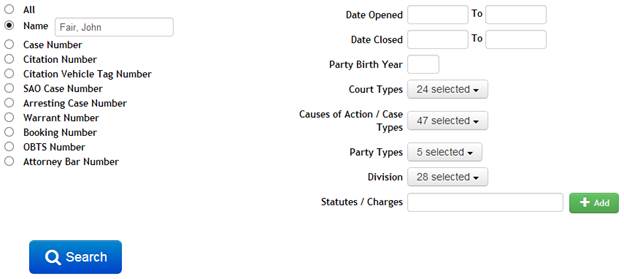
1.
Click on the desired term to bring up a search
box for it.
2.
Enter the term to search for in the search field
and press enter.
3.
If more precise filtering is required use the
fields on the right hand side of the screen. Multiple
filters can be used simultaneously.
a.
Putting dates in the Date Opened and or Date
Closed will return only cases opened or closed within those
time frames
b.
Putting a date in the Party Birth year field will
return only cases which have a defendant born in the
specified year.
c.
To limit the result to specific Court Types, Case
Types, Party Types, or Divisions, select the desired items
from their respective dropdowns (all are selected by
default).
d.
To limit the search to specific statutes, begin
entering the number or description of the statute. When the
desired statute appears in the autocomplete list, click on
it and click on the Add button to add it to the list of
allowed statutes.
1.
Click on the All
option at the top of the list of search terms.
2.
Put one or more filtering options into the fields
on the right hand side of the screen. Multiple filters can
be user simultaneously.
a.
Putting dates in the Date Opened and or Date
Closed will return only cases opened or closed within those
time frames
b.
Putting a date in the Party Birth year field will
return only cases which have a defendant born in the
specified year.
c.
To limit the result to specific Court Types, Case
Types, Party Types, or Divisions, select the desired items
from their respective dropdowns (all are selected by
default).
d.
To limit the search to specific statutes, begin
entering the number or description of the statute. When the
desired statute appears in the autocomplete list, click on
it and click on the Add button to add it to the list of
allowed statutes.
3.
Click on the search button return all cases that
meet the filter criteria (i.e. all felony cases opened in
the first week of July).
The Document Search screen allows the user to search
documents across cases for words or phrases.

Please
Note: This feature may be slow on large databases
when specific cases are not specified.
1.
Click on the Document Search tab on the User
Dashboard to bring up the Document Search screen.
2.
To search documents on the selected cases, type
the desired phrase into the search box and click the search
button.
a.
If no selected cases are displayed on the right,
any search will be applied to all documents present in the
database.
3.
A list of all documents in the selected cases
containing the searched text will appear, along with an
image viewer.
1.
Documents can be sorted within their cases number
headings by clicking on the on the column header.
2.
Click the column again to reverse the sort order.
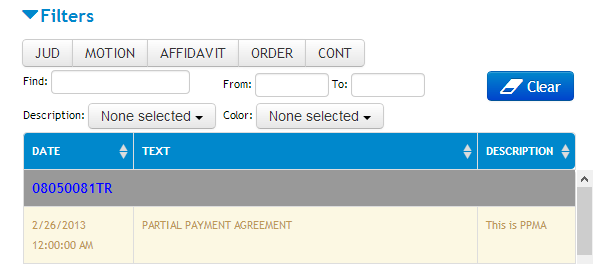
1.
After performing a search, four new options will
appear to actively filter the results.
a.
The Find field searches the Case Number as well
as all text in the Date, Text, and Description columns in
the document list.
b.
The From and To fields
filter documents to the selected date range by the docket
creation date.
c.
The Description drop down filters the documents
based on the description of the docket they are attached
to. To select descriptions click on the drop down and
select all desired descriptions.
d.
The Color drop down filters the documents by
highlight color of the docket they are attached to. To
select colors, click on the drop down and select all
desired highlight colors from the list.
Adding a Case from a Within a Case
1.
Open a case by clicking on its link.
2.
From the Case Details screen, click on the
Document Search Button.
a.
Multiple cases can be added in this manner prior
to using the document search to search them.
Adding a Case from Outside of a Case
1.
Cases can be added to the list from three
different locations(please see their respective sections in
this guide for information on accessing them):
a.
The My Open Cases
Screen.
b.
The Results screen of a Case Search.
c.
The Cases Tab on the Party Details Screen.
2.
To add a case from any of these lists, click on
the checkbox under the OCR column.
3.
If more than three cases are in the list, a
scroll bar will be allows access to the rest of the list.
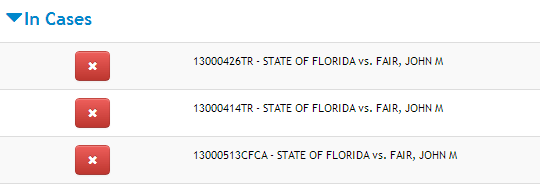
1.
Click on the Document Search tab on the User
Dashboard to bring up the Document Search Screen.
2.
To the right of the search box, under the In
Cases Header click on the
 Remove
Button to remove a case from the search.
Remove
Button to remove a case from the search.
 The selected
document can be navigated with the controls at the top of
the viewer window.
The selected
document can be navigated with the controls at the top of
the viewer window.
1.
Click the
 Pop Out Button to open the document in a new
browser window.
Pop Out Button to open the document in a new
browser window.
2.
To jump to the beginning or end of the document
click on the outer left or right arrows respectively.
3.
To move to the next or previous page, click on
the inner left or right arrow respectively.
4.
To zoom in or out on the document click on the
magnifying glass icons.
5.
To advance to the next page with an instance of
the searched phrase or return to the previous page click on
the right or left arrows labeled Search Term Page Hit
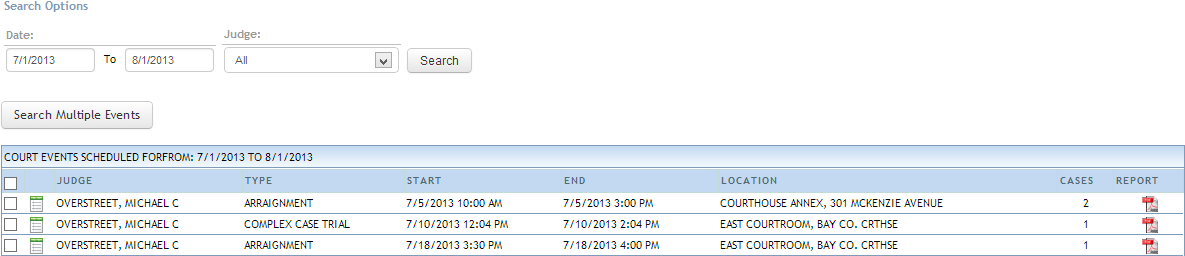
Court
Docket

The Court Docket Tab allows the user to search and view
court events and any associated cases.
1.
Click on the Court Dockets Tab on the User
Dashboard to bring up the Court Docket Search screen.
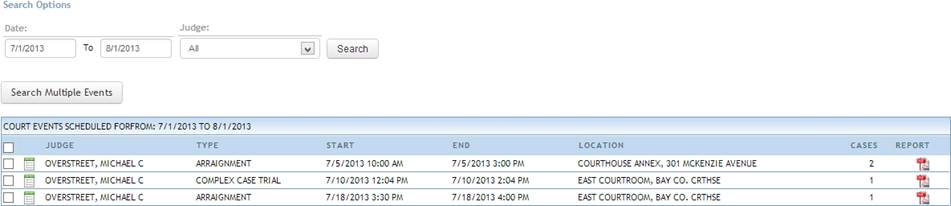
2.
Click on the date fields to open calendar
dropdown menus. From these dropdowns select the desired
date range.
3.
To filter the results by judge, select the
desired judge from the Judge drop down menu.
4.
Click the search button to search with the
current date and judge selection.
a.
Search results can be sorted by the any column by
clicking on the header.
1.
After performing a Court Docket Search click on
the
 Docket icon next the
desired event to open a list of cases for that Court
Docket.
Docket icon next the
desired event to open a list of cases for that Court
Docket.
a.
If multiple events are desired, check the boxes
next to the events and click the Search Multiple Events
Button.

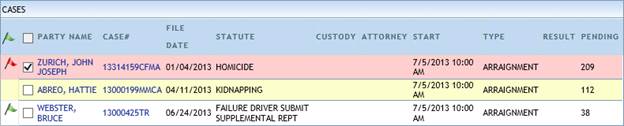
2.
From the Cases for Court Docket Screen the user
can open cases and parties by clicking on their links.
3.
On this screen, cases will be highlighted
depending on the time that has elapsed since their
creation. A
yellow highlight indicates more than 90 days have elapsed
since the case was filed and a red highlight indicates that
more than 180 days have elapsed.
4.
Judges can add a personal judicial review flag to
a case by clicking next to the case to be flagged
underneath the
 flag icon.
5.
Clicking the checkbox removes the case from the
list view, allowing for a convenient view of the remaining
cases in a docket.
6.
To show checked items, click the All and
Incomplete Buttons to change the view mode.
1.
When viewing the court docket search results or
court docket details, click the  PDF Icon to generate a
printable report of the event.
PDF Icon to generate a
printable report of the event.
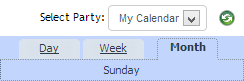
Calendar

The Calendar Tab allows users to view court and personal
events and create personal events.
1.
Select the Calendar Tab on the User Dashboard to
open the Calendar screen.
2.
To select the View Mode (Day/Week/Month), click
on the buttons in the top right of the Calendar Screen.
a.
If access to more than one Calendar is
configured, alternate calendars can be accessed by
selecting the desired calendar from the drop down and click
on the
 Refresh icon.
3.
To navigate the Calendar, use the controls in the
top left of the Calendar screen
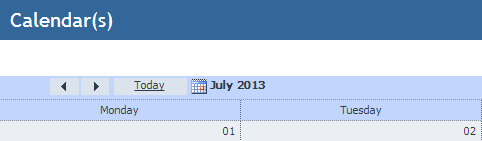
a.
Click on the left and right arrow buttons to move
forward or backward from the current view.
b.
Click on the Today Button to jump to the current
day.
c.
Click on the Calendar icon to select a specific
date to jump to.
4.
If an event on the calendar has associated cases,
the Court Docket can be opened by clicking on the event.
1.
Double click on a day to add an event.
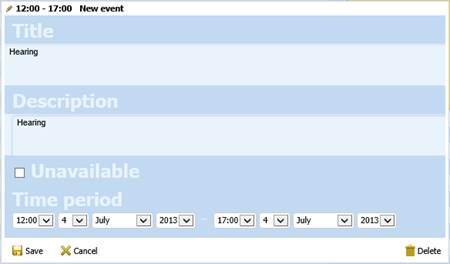
2.
In the details pop up window that appears, adjust
the title and description by typing in the indicated boxes.
3.
To adjust the event time frame used the time and
date dropdowns to adjust the start and end times for the
event.
4.
Click the Save Button to save the event.
a.
To delete an event, double click it and select
delete.
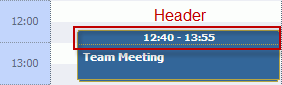
1.
Click and drag vertically to create the event and
set the initial length.
2.
Enter the name of the event by typing in the
event box.
3.
Click on the Save Button to save the event.
1.
Open the event details window for the event.
a.
To open the details from the Month View, double
click on an event.
b.
To open the details from the Day or Week View
click on an event then click on the  Details icon.
2.
The title and description can be edited by typing
in the Title and Description Boxes.
3.
The time frame of the event can be edited from
the time and date drop downs at the bottom of the
window.
4.
Click the Save Button to save changes.
1.
To change the start time of an event click on the
event header and drag it to the desired time (Events can be
dragged to different days as well).
a.
On the month view, click and drag on an event to
change the day.
2.
To change the duration of the event click and
drag on the bottom edge of the event.
1.
From
the month view, click on a day and drag left or right to
create a Multi-Day Event.
2.
Once the event includes the desired days release
the mouse. The user will be prompted to set details for the
event as for a normal event
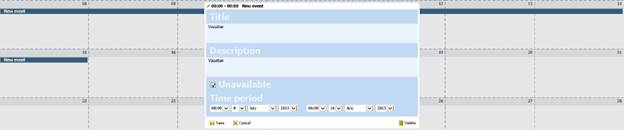
3.
Once details are entered click the Save Button.
Tasks 
The Tasks Tab allows the user to track and manage to-do
items.
1.
On the Use Dashboard, click on Tasks to open the
Tasks screen.
2.
Click on the Add New Task Button.
3.
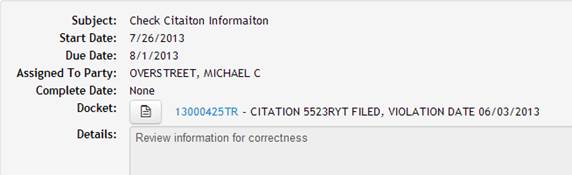
On the popup that appears fill out the task
information.
a.
The Subject field is for a short description of
the task
b.
The Start Date is the date after which the task
will be considered active. If no date is set the task will
be considered active.
c.
The Due Date is the date on which the task is to
be completed by, after which it will be marked overdue. If
no date is set, the due date will display as none in the
task list.
d.
The Complete Date is the date on which the task
was completed.
e.
The Assigned To party field is used to assign a
task to another party. The active user is
selected by default (Please Note: If the task is assigned to
another party it will not be visible in the task list for
the active use.)
f.
The Details field is for notes or explanations
pertinent to the task.
4.
Once all task information has been entered
successfully, click on the add button to add the task to
the list.
1.
On the Use Dashboard, click on Tasks to open the
Tasks screen.
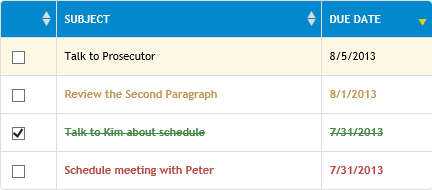
2.
Find the task to be completed in the list and
click the check box to the left of the description.
a.
To un-complete a task click on the filled check
box to remove the completed status.
3.
Completed tasks will be colored green and have
their subject line and date struck through.
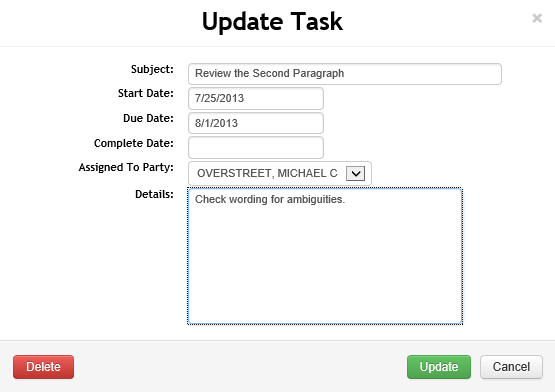
1.
On the Use Dashboard, click on Tasks to open the
Tasks screen.
2.
Double click on the task to be edited.
3.
On the pop up that appears make any necessary
changes and click the update button to save the task. Click
delete again when asked to confirm.
1.
1. On the Use Dashboard, click on Tasks to open
the Tasks screen.
2.
Double click on the task to be edited.
3.
On the pop up that appears click the Delete
Button
1.
On the Use Dashboard, click on Tasks to open the
Tasks screen.
2.
Click on one of the four filter tabs to change
which tasks are displayed.
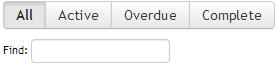
a.
The All Tab displays all tasks, regardless of
completion status or active status.
b.
The Active Tab displays all uncompleted and
overdue tasks which are active based on their start date.
c.
The Overdue Tab displays all active tasks which
have passed their due date.
d.
The Complete Tab displays all tasks that have
been marked complete.
3.
To further refine the task list, enter text in
the Find field to search across the subject and due date
columns in the task list.
Tasks added from Case Dockets contain additional
functionality.
Please Note: Adding tasks from Case Dockets is cover in
detail in the Case Details section of this document.
1.
To view a docket image attached to the task click
on the
 view image button. If
an image exists on the docket it will open in a new browser
window.
view image button. If
an image exists on the docket it will open in a new browser
window.
2.
To view the Case Details, click on the case
number hyperlink.
The Documents Tab allows the user to manage generated and
uploaded documents that require signatures or have been
signed.

1.
On the User Dashboard, click on Documents to open
the Documents screen.
2.
On the Documents screen, make sure the desired
Tab at the top of the screen is active.
3.
Click on a document�s list entry to bring up the
document in the viewer window on the right hand side of the
screen
4.
Click on the
 Save
icon to save a copy of the document to the computer.
Save
icon to save a copy of the document to the computer.
5.
Click on the
 Print
icon to print the document.
Print
icon to print the document.
6.
Click on the left and right outer arrows to jump
to the beginning or end of the document respectively.
7.
Click on the left and right inner arrows to move
to the previous or next page respectively.
8.
Click on the magnifying glass icons to zoom in or
on the document. Alternatively select the zoom level from
the drop down menu.
9.
Click on the three fitting icons
 to,
from left to right, fit the page by width, show an entire
page or show two pages in a side by side view.
to,
from left to right, fit the page by width, show an entire
page or show two pages in a side by side view.
10.
Type in the Find field to search the text of the
document for words or phrases.
11.
Click on the
 previous
and next hit buttons to move to the previous or next
instance of the searched term in the document.
previous
and next hit buttons to move to the previous or next
instance of the searched term in the document.
1.
On the User Dashboard, click on Documents to open
the Documents screen.
2.
On the Documents screen, make sure the Documents
Tab at the top of the screen is active.
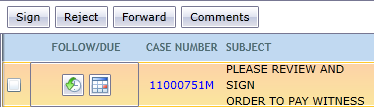
3.
Click a document to highlight it. This will also
open the document in the image viewer on the right hand
side of the screen. After reviewing the
document, click either the Sign Button or the Reject Button
to sign or reject the document.
a.
If rejecting the document, a prompt will appear
for a reason for the rejection.
1.
On the User Dashboard, click on Documents to open
the Documents screen.
2.
On the Documents screen, make sure the Documents
Tab at the top of the screen is active.
3.
Click on the check boxes next to the desired
documents to select them.
4.
Click on either the Sign Selected or Reject
Selected Buttons to sign or Reject the selected documents.
a.
If rejecting documents, a prompt will appear for
a reason for the rejection.

1.
On the User Dashboard, click on Documents to open
the Documents screen.
2.
On the Documents screen, make sure the Documents
Tab at the top of the screen is highlighted.
3.
Click a document to highlight it and click the
Forward Button.
When prompted, select the desired party from the dropdown
menu and click send.
1.
On the User Dashboard, click on Documents to open
the Documents screen.
2.
On the Documents screen, Make sure the Documents
Tab at the top of the screen is highlighted.
3.
Click on the check box next to the desired
documents to select them.
4.
Click on the Forward Selected Button and select
the desired party from the popup that appears.
1.
On the User Dashboard, click on Documents to open
the Documents Screen.
2.
On the Documents screen, make sure the Documents
Tab at the top of the screen is highlighted.
3.
Click on a document to highlight it and click the
Comments Button.
4.
On the pop up that appears click on the Add
Comment Button to open the text entry field.
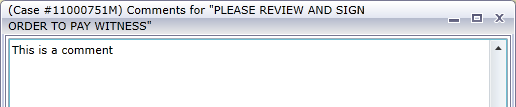
5.
One the comment is entered click on the Save
Button to record the comment.
1.
On the User Dashboard, click on Documents to open
the Documents screen.
2.
On the Documents screen, Make sure the Documents
Tab at the top of the screen is highlighted.
3.
Click on a document to highlight it and click the
Comments Button.
4.
On the popup that appears click on the
 Trash Can icon to delete
the comment.
Trash Can icon to delete
the comment.
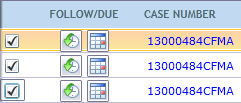
Setting Follow-up Status and
Due Dates
1.
On the User Dashboard, click on Documents to open
the Documents screen.
2.
On the Documents screen, Make sure the Documents
Tab at the top of the screen is highlighted.
3.
On the document row, click the left-hand icon to
cycle through the three stages of follow-up: Clear
 ,
Flagged for Follow-Up
,
Flagged for Follow-Up
 , and Complete
 .
.
4.
To set a due date
for follow-up click the
 Calendar icon and select a
date in the popup window.
Calendar icon and select a
date in the popup window.
a.
Due dates withihn
the next week will display as red to serve as an additional
reminder.
1.
On the User Dashboard, click on Documents to open
the Documents screen.
2.
On the Documents screen, click on the In Process
Tab to access a list of unfinished documents that are not
ready to be signed yet.
3.
To access one of these documents, click on its
entry in the list.
1.
On the User Dashboard, click on Documents to open
the Documents screen.
2.
On the Documents screen, click on Processed Tab
to access a list of signed documents.
3.
To change the range of viewable documents, adjust
the From and To dates to the desired range and then click
the Filter Button
1.
On the User Dashboard, click on Documents to open
the Documents screen.
2.
On the Documents screen, click on Emails Tab to
access a list of emails with attached documents.
Searching Emails

1.
To search within the email records, select the
type of field to search in the left drop down and enter a
search in the Find field.
2.
To further filter the search results, the user
can select a From and To date
from the date drop downs as well as the status of the email
from the right hand drop down.
The Image Viewer Tab allows the user to easily view
multiple images or multiple pages of a multi-page document
simultaneously.
1.
When viewing case dockets from within a case,
click on the
 Plus icon next to a docket
with an image to add that image to the image viewer for
easier viewing.
Plus icon next to a docket
with an image to add that image to the image viewer for
easier viewing.
a.
Multiple images can be added to the image viewer
for simultaneous viewing.
2.
Once an image is added to the Image Viewer, click
on the Image Viewer tab on the User Dashboard to open the
Viewer.
1.
Pages can be moved within their document window
by clicking and dragging on the page.
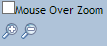
2.
To zoom in and out on the current page, click on
the Magnifying Glass Buttons at the top of the document
window.
a.
The image viewer also support a mouse over zoom
function for quickly focusing on specific sections of the
document, to activate this functionality click on the Mouse
Over Zoom check box.
1.
To move forward or backward in a document click
on the inner arrows at the top of the document window.
2.
To jump to the beginning or end of a document,
click on the outer arrows at the top of the document
window.
1.
To rotate the document 90 degrees, click on the
Rotate Button.
2.
Individual pages of can be popped out into a
separate document window. To pop out a page, navigate to
the desired page can click on the Pop-Out Button.
Please
Note: Access to e-Filing is managed from the
Benchmark Windows Client.
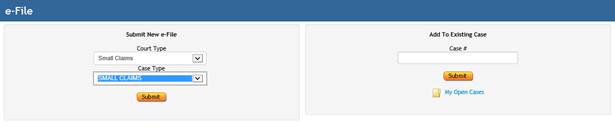
1.
On the User Dashboard, click on the e-File tab to
expand it and select Submit New.
2.
Under Submit New e-File, select the desired Court
Type and Case Type and click Submit.
3.
Click the edit buttons to add information to the
default case parties, if additional parties are required,
click on the Add Party link. Click the Documents button to
proceed.

4.
If Documents are to be submitted with the case,
click the Add Document link.
5.
A window will open allowing the user to select a
file from their computer. From this window navigate to the
location of the desired document and double click it.
(Acceptable file types are .PDF and .TIF)
6.
If
applicable, select the Document Type from the drop down and
click the Review Button to proceed.
a.
If the document is a PDF, the user will be
prompted to enter the number of pages before being able to
continue.

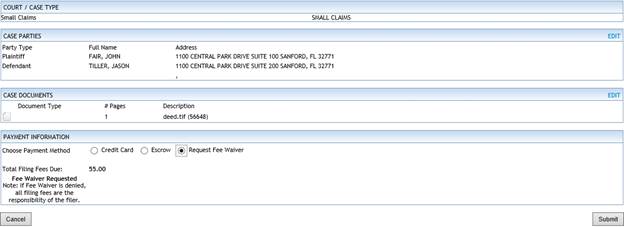
7.
From the Review & Submit Screen, review the
information and click the edit link to make any necessary
changes. On the bottom portion of the screen, select the
desired payment method from the options available and click
submit.
8.
If submission was successful, Benchmark will
generate and display an e-File confirmation number.
1.
There are three methods to e-File a document to
an existing case.
a.
From the User Dashboard:
i.
On the User Dashboard, click on the e-File tab to
expand it and select Submit New.
ii.
Type in the case number of the desired case and
click submit.
b.
From the case details, click on the e-File
Button.
c.
Click on the My Open Cases tab on the User
Dashboard and click the e-File Icon  next to the
desired case.
next to the
desired case.
2.
Click the Add Document link.
3.
A window will open allowing the user to select a
file from their computer. From this window navigate to the
location of the desired document and double click it.
(Acceptable file types are .PDF and .TIF)
4.
If
applicable, select the Document Type from the drop down and
click the Review Button to proceed.
If the document is a PDF, the user will be prompted to
enter the number of pages before being able to continue.

5.
From the Review & Submit Screen, review the
information and click the edit link to make any necessary
changes. When ready, click the Submit Button.

3.
4.
5.
6.
If submission was successful, Benchmark will
generate an e-File confirmation number.
Please
Note: Template files must be in .docx format.
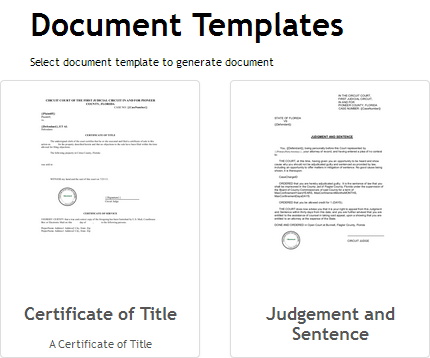
1.
Click the Document Template tab on the User
Dashboard to open the Document Template Management Screen.

2.
Click on the Add New Button and enter the title
and description when prompted.
3.
On the Edit Templates screen, click on the Upload
button.
4.
From the pop up that appears, navigate to the
desired file and double click on it to upload it.
5.
Once the upload is complete, a navigable preview
of the template will be displayed for verification
purposes.
6.
Click the Save Button to save the template.
1.
Click the Document Template tab on the User
Dashboard to open the Document Template Management Screen.
2.
From the Document Template Management Screen,
click on the template to be edited.
3.
Click the Edit Button to download the current
template for editing.
4.
Open and edit the downloaded template file in
Microsoft Word.
5.
Once the desired changes have been made and
saved, click on the Upload Button.
6.
Navigate to the edited document and double click
it to upload the edited template.
7.
Click the Save Button to save the updated
template.
Template Data Fields
Templates function by pulling Case information into
designated data fields. A brief list of supported fields is
included here, for more information see the Template Field
Reference Document.
|
Field
|
Description
|
Field
|
Description
|
|
{{CaseNumber}}
|
The case number
|
{{AmountDue}}
|
The amount owed on the
case
|
|
{{CaseFileDate}}
|
The case filing
date
|
{{DisplayName}}
|
The Case Display
Style
|
|
{{PrimaryParty}}
|
The name of the primary
party on the case
|
{{Defendant}}
|
The name of the
defendant (usually synonymous with the primary
party)
|
|
{{SecondaryParty}}
|
The name of the
secondary party on the case
|
{{Plaintiff}}
|
The name of the
plaintiff (usually synonymous with the secondary
party)
|
|
{{PrimaryPartyAttorney}}
|
The name of the attorney
for the primary party
|
{{Signature}}
|
A place holder for the
electronic signature.
|
|
{{SecondaryPartyAttorney}}
|
The name of the attorney
for the secondary party
|
{{SigningDate}}
|
The date on which a
document is signed.
|
If a template is multiple pages long, it can be navigated
with the controls at the top of the template.

1.
Click the Document Template Tab on the User
Dashboard to open the Document Template Management Screen.
2.
From the Document Template Management Screen,
click on a template.
3.
Click on the outer left and right arrows to jump
to the beginning or end of the template respectively.
4.
Click on the inner left and right arrows to the
previous or next page of the template respectively.
1.
Click the Document Template Tab on the User
Dashboard to open the Document Template Management Screen.
2.
From the Document Template Management Screen,
click on the template to be deleted.
3.
Click on the Delete Button and click yes when
asked to proceed.
1.
Click on the My Open Cases Tab on the User
Dashboard to bring up a list of all cases the user is
current a part of.

2.
Click the + sign next to the
 folder icon to expand a
summary of the case.
folder icon to expand a
summary of the case.
3.
If the user is an attorney, or has e-Filing
rights, they can access e-Filing from this page via the
e-File Icon
1.
Click on the Case Lists tab on the User Dashboard
to display a list of the case lists the user can
access.

2.
To access individual lists, click on the name of
the list and enter criteria, such as date range or judge
name if prompted.
Case File Requests
allows the user to request physical files for a
case.
1.
Click on the Case File Request Tab on the User
Dashboard to open the case file request screen.
2.
Enter the case number of the desired case and
click search.
3.
Once the search has completed, all storage items
for the case will be displayed with information on their
location and check out status.
4.
To submit a new request click on the  new
request icon.
new
request icon.
5.
On
the pop up appears select the correct party, location and
priority from the drop downs and click the Submit
Button.
Click the Recent Cases Tab on the User Dashboard to open a
list of the 10 most recently viewed cases.
Click the Recent Searches Tab on the User Dashboard to open
a list of searches from the current session.
1.
Hover over the list entry to view the criteria
used in the search.
2.
Click on the list entry to return to the search
results for that search.
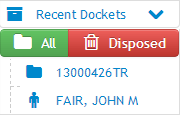
1.
Click on the Recent Dockets tab on the User
Dashboard to open a list of the cases and defendants in the
most recently selected docket.
2.
To open a case or party, click on the desired
link.
1.
To limit a docket to cases with disposed case
events click on the Disposed Button, to return to viewing
all of the cases, Click on the All Button.
Please
Note: To open a case, click on the case number
link from anywhere else on the site.

Case Detail
Buttons
1.
The buttons along the top of the case details
screen provide several options relating to the case.
a.
The Document Search Button adds a case to the
search list for the cross case document search
b.
The print button enables the user to generate
forms not found in the Document Templates, such as DUI
School Forms.
c.
The E-File Button allows attorneys to e-File
documents to the open case.
d.
The Email Button allows the use to easily email
documents to all parties attached to a case.
e.
The Review Button flags a case for future
Judicial Review.
f.
The Print View button displays the case summary
tab in a printer friendly layout.
g.
If the user has previously opened a Court Docket,
the Cases button will return the user to the details of
that event.
The Summary Tab allows quick access to the details of all
parties on a case, related Court Dockets, as well as an
overview of Fees, Charges and Documents on the case.
1.
To view the Summary Tab, click on Summary at the
top of the Case Details.
The History Tab shows a brief list of all of the
defendant�s previous cases with Charge, Disposition, and
Fee information.
1.
To view the History Tab, click on History at the
top of the Case Details.

The Dockets Tab allows the user to view dockets and images
attached to the case.
1.
To access the Dockets Tab, click on Dockets at
the top of the Case Details.
1.
Dockets can be filtered by a number of
criteria. To
show all filter options click the
 Search icon. To limit the list to only
dockets with images attached, click the
Search icon. To limit the list to only
dockets with images attached, click the
 Filter icon.
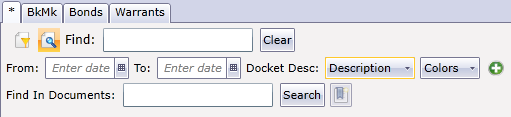
2.
Description and Color filter options can be saved
to tabs that appear on every case for easy access to
frequently used searches. To create a new tab, click on the
Plus icon with the desired
criteria entered.
1.
Images attached to dockets can be navigated with
the controls at the top of the image viewer on the right
hand side of the screen.

a.
Click the inner arrows to move forward and
backwards through a document.
b.
Click the outer arrows to jump to the beginning
or end of a document.
c.
Click on the
 pdf
icon to view a printable, pdf version of the document.
pdf
icon to view a printable, pdf version of the document.
d.
Click on the magnifying glass icons to zoom in
and out on the document.
e.
To fit the document to the viewer window, select
either Fit to Width or Fit to Height.
1.
To add or edit a note to a docket, click on the
 Add Note icon (if there is
a pre-existing note the icon will change to the
Add Note icon (if there is
a pre-existing note the icon will change to the
 Edit Note
icon).
Edit Note
icon).
2.
On the note entry popup that appears, click on
the region labeled, �Click here to add a new item� to add a
new note.
a.
To edit a note, double click on the note entry.
3.
Enter the note text in the text field and select
the security level from the drop down list.
4.
Click the Save button to save the note.

5.
To remove a note, click the remove button on the
note entry popup.
1.
Click on the desired docket entry to highlight
it.
2.
Click on the Add Task Button at the top of the
list.
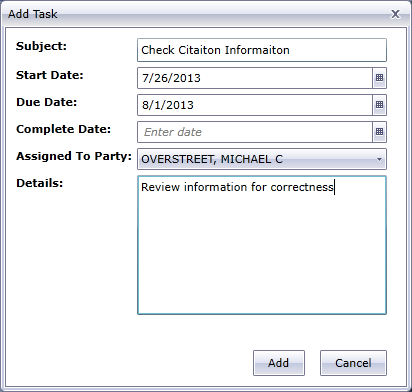
3.
On
the popup that appears fill out the information for the
task.
a.
The Subject field is for a short description of
the task
b.
The Start Date is the date after which the task
will be considered active. If no date is set the task will
be considered active.
c.
The Due Date is the date on which the task is to
be completed by, after which it will be marked overdue. If
no date is set, the due date will display as none in the
task list.
d.
The Complete Date is the date on which the task
was completed.
e.
The Assigned To party field is used to assign a
task to another party. The active user is
selected by default (Please Note: If the task is assigned to
another party it will not be visible in the task list for
the active use.)
f.
The Details field is for notes or explanations
pertinent to the task.
4.
Once all task information has been entered
successfully, click on the add button to add the task to
the list.
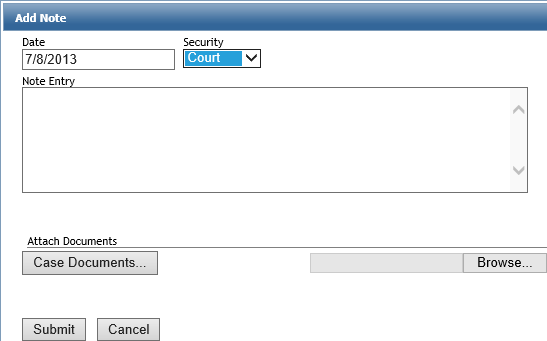
The Notes Tab allows the user to attach notes and documents
to the case as a whole and manage their visibility.
1.
To access the Notes Tab, click on Notes at the
top of the Case Details.

2.
To post a note, click on the Add Case Note link.
3.
On the popup window that appears enter the note
in the test entry field, set the security level, and attach
any necessary documents.
a.
To attach a documents that is already present on
the case, click on the Case Documents Button and select any
desired documents from the list that appears.
b.
To attach a document not on the case, click on
the Browse Button, navigate to the desired file, and double
click on it.
4.
Notes can be edited or deleted with the Edit and
Delete Buttons.
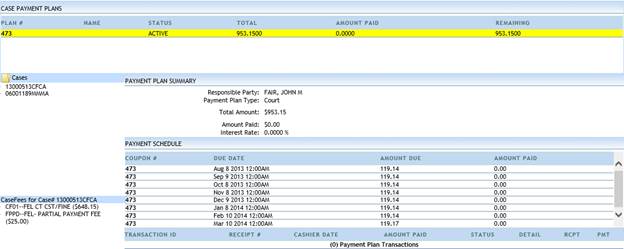
The Payment Plans Tab displays the detail of any payment
plans associated with the case.
Please
Note: Access to the Payment Plans Tab is managed
from the Benchmark Windows Client.
1.
To access the Payment Plans tab, click on Payment
Plans at the top of the Case Details.
2.
If multiple cases are included on a single plan,
click the case number to display the details for that case.
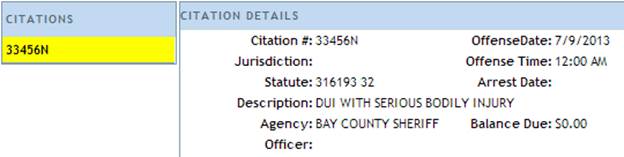
The Citations Tab displays the details of any citations on
the case.
Please
Note: Access to the Citations Tab is managed from
the Benchmark Windows Client.
1.
To access the Citations Tab, click on Citations
at the top of the Case Details.
The Charges Tab displays information on the charges on the
case along with any disposition and sentencing information.
Please
Note: Access to the Charges Tab is managed from
the Benchmark Windows Client
1.
To access the Charges Tab, click on Charges at
the top of the Case Details.
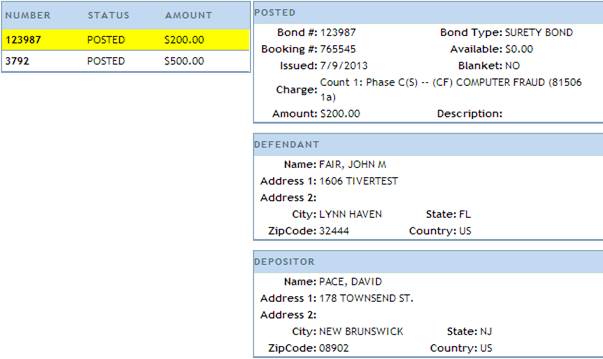
The Bonds Tab displays the status and details of any bonds
associated with the case.
Please
Note: Access to the Bonds Tab is managed from the
Benchmark Windows Client.
1.
To access the Bonds Tab, click on Bonds at the
top of the Case Details.
The Emails Tab displays emails containing documents sent
between parties attached to the case
To access the Emails Tab, click on Emails at the top of the
Case Details.

1.
To search within the email records, select the
type of field to search in the left drop down and enter a
search in the Find box.
2.
To further filter the search results, the user
can select a From and To date
from the date drop downs as well as the status of the email
from the right hand drop down.
The Document Management Tab allows the user to generate,
upload, and sign documents.
1.
To generate a document, click on Document
Management at the top of the Case Details.
2.
Select the desired Document Template by clicking
on it. The User will be taken to a screen to edit the
document.
3.
If changes need to be changed from the
automatically filled values click in the text entry field
and change the text to the desired value.

4.
To save a document for further editing later,
click the Save Button.
5.
Once a document is finished the user has two
options
a.
The Queue Button Saves the document in the
documents tab for later signing.
b.
The Sign Button signs a document
immediately.
The signed document will be viewable from the Processed
Queue in the documents tab.
If after editing all of the available fields, further
changes need to be made to a document it can be downloaded
for editing in Microsoft Word.
1.
To download the document click on the Edit
Button.
2.
The document will be downloaded to the User�s
computer.
1.
To upload a document click on Document Management
at the top of the Case Details.
2.
Select the Blank Document Template by clicking
on. The User
will be taken to a screen to upload a document.
a.
If the document to be uploaded is an edited
version of a document for which a template exists, select
the template for that document type and skip step 5.
3.
Click on the Upload Button. A file browser window
will appear. Navigate to the file to be uploaded and double
click on it (accepted file types are .docx and .pdf).
4.
Once the file is uploaded edit the document title
and description by clicking in the title and description
fields and editing the text to the desired value.
5.
To save a document to return to later, click the
Save Button.
6.
To sign the document THIS MAY NEED TO BE REVISED
ONCE THINGS ARE FINALIZED click on the Insert Signature
Button to insert a signature into the document.
a.
Change the position of the signature by clicking
and dragging on the body of the signature.
b.
Resize the signature by clicking and dragging on
the grey circles at the corners of the signature.
7.
To save the signature on the document, click on
the Save Signature button

8.
To cancel the signature and return to the
document click on the Cancel Signature Button.
Please
Note: To access the Party Details screen click on
a party name link from anywhere else on the site.
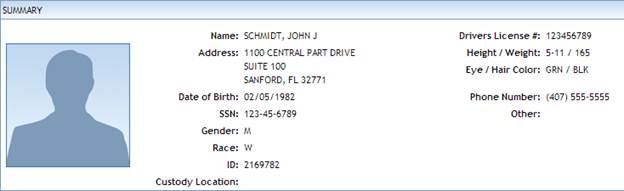
The Summary Panel is always visible on the Party Details
and displays pertinent party information including:
1.
Mug Shot
2.
Name
3.
Address
4.
Date of Birth
5.
SSN
6.
Gender
7.
Race
8.
Driver�s License Number
9.
Height
10.
Weight
11.
Hair Color
12.
Eye Color
13.
Phone Number
The Cases Tab displays all cases a party is attached to as
well as their role in the case.

1.
Click on the + icon under the details to expand a
summary of the case within in the list.
2.
Click on the OCR checkbox to add the case to the
cross case Document Search
3.
Click on any Party or Case links to open the
respective details screens.
The Events Tab displays details for all court events that
the party has been part of.

1.
Click on the Case # link to open the Case Details
for that case.
2.
Click on the Event link to open the associated
Court Docket.
The Charges/Dispositions Tab displays all charges and
dispositions for the party.

1.
Click on the Case # link to open the Case Details
for that case.
The Fees/Assessments Tab displays the fee and payment
history for the party.

1.
Click on the Case # link to open the Case Details
for that case.
The Additional Information Tab displays extraneous party
information such as aliases and additional addresses.

 Processing...